Xposed 101: How to Temporarily Disable Xposed to Fix a Bootloop
The Xposed Framework is an incredibly powerful tool. But because of this power, there's a chance that something could go wrong when installing a broken or incompatible module, which can cause bootloops or even soft-brick your phone.Depending on how bad the situation is, the only way to get things back up and running might be to disable the Xposed Framework itself, which renders any broken modules powerless. There are two ways to disable Xposed — either using a safe mode button combination, or by flashing the Xposed disabler ZIP.Regardless of which method you use, you should be able to recover from a bootloop long enough to uninstall the broken module. Once you've done that, you can re-enable Xposed to get all of your old modules back the way they were, and your phone should have no problem booting up again.Don't Miss: How to Install the Xposed Framework on Android Lollipop or Marshmallow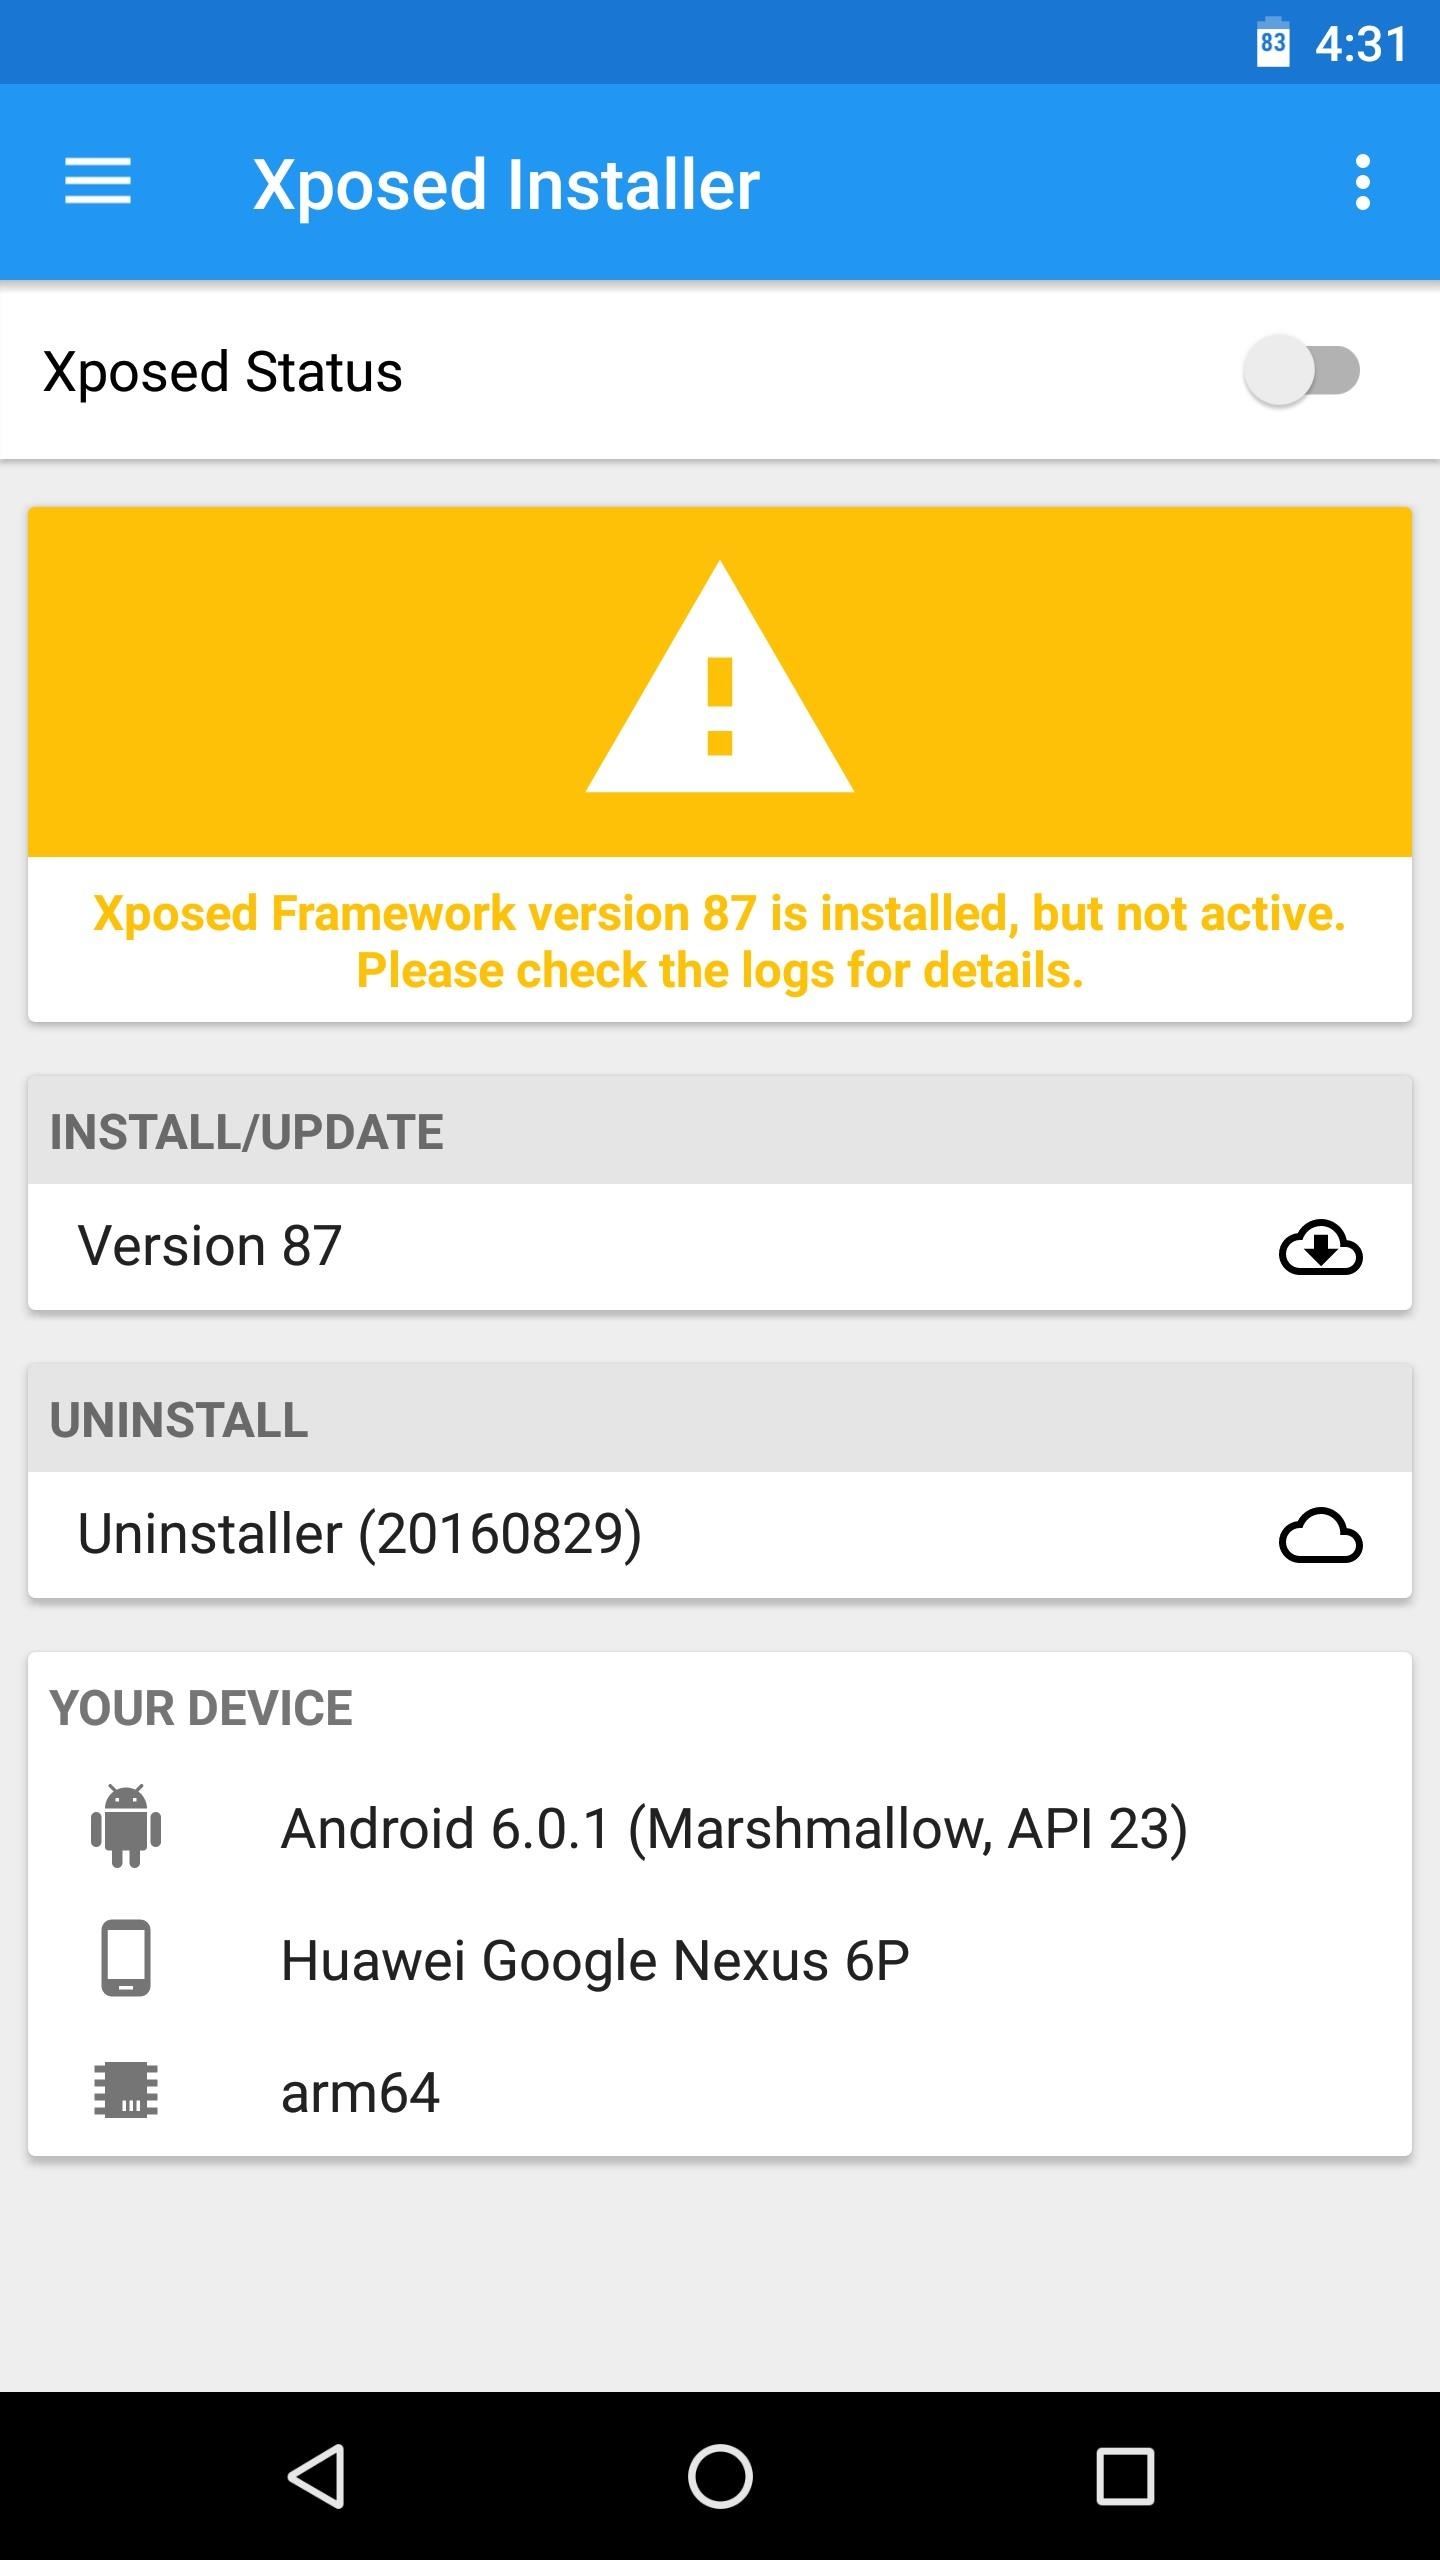
Method 1: Use the Button CombinationAs I mentioned, there are two methods to temporarily disable Xposed. This first method is by far the easiest, so you should try this before doing anything else if you suspect that an Xposed module is causing your phone to bootloop. This doesn't work with every phone, but it works with the vast majority of devices.The short version of these instructions is simple: Press any hardware button repeatedly while your phone is booting to disable Xposed. But in case you need more details, I'll outline the whole process.Don't Miss: The Big Android Dictionary — A Glossary of Terms You Should KnowTo start, press and hold your phone's power button for ten seconds, which will trigger a hard reboot. As soon as the screen goes black (before any pre-boot splash screens appear), start clicking any hardware button on your phone repeatedly. Any physical button should work, but we recommend pressing the power button repeatedly in case your phone uses other button combinations to boot into recovery mode, for example.Eventually, you'll feel two short buzzes from your phone's vibration motor — this is Xposed acknowledging that you're trying to enter safe mode. From there, press the same button four more times in quick succession, and with each press, you'll feel another vibration. After the fourth button press is acknowledged, you'll feel a long vibration — at this point, you can stop pressing the button, because your phone will now boot up with the Xposed Framework disabled.When your phone boots up, open your Xposed Installer app and you'll notice that the framework is disabled. From here, just head to the Modules section, then long-press the broken module and choose "Uninstall" on the popup to remove it. Next, you'll probably want to re-enable Xposed. To do that, open your favorite root file browser and navigate to the following directory:/data/data/de.robv.android.xposed.installer/conf/Once you've found this folder, locate the file named "disabled" and delete it. After you've done that, just restart your phone, and when you get back up, Xposed will be enabled again. All of your modules will still be enabled (with the exception of the broken one you uninstalled), so it'll be like nothing ever happened.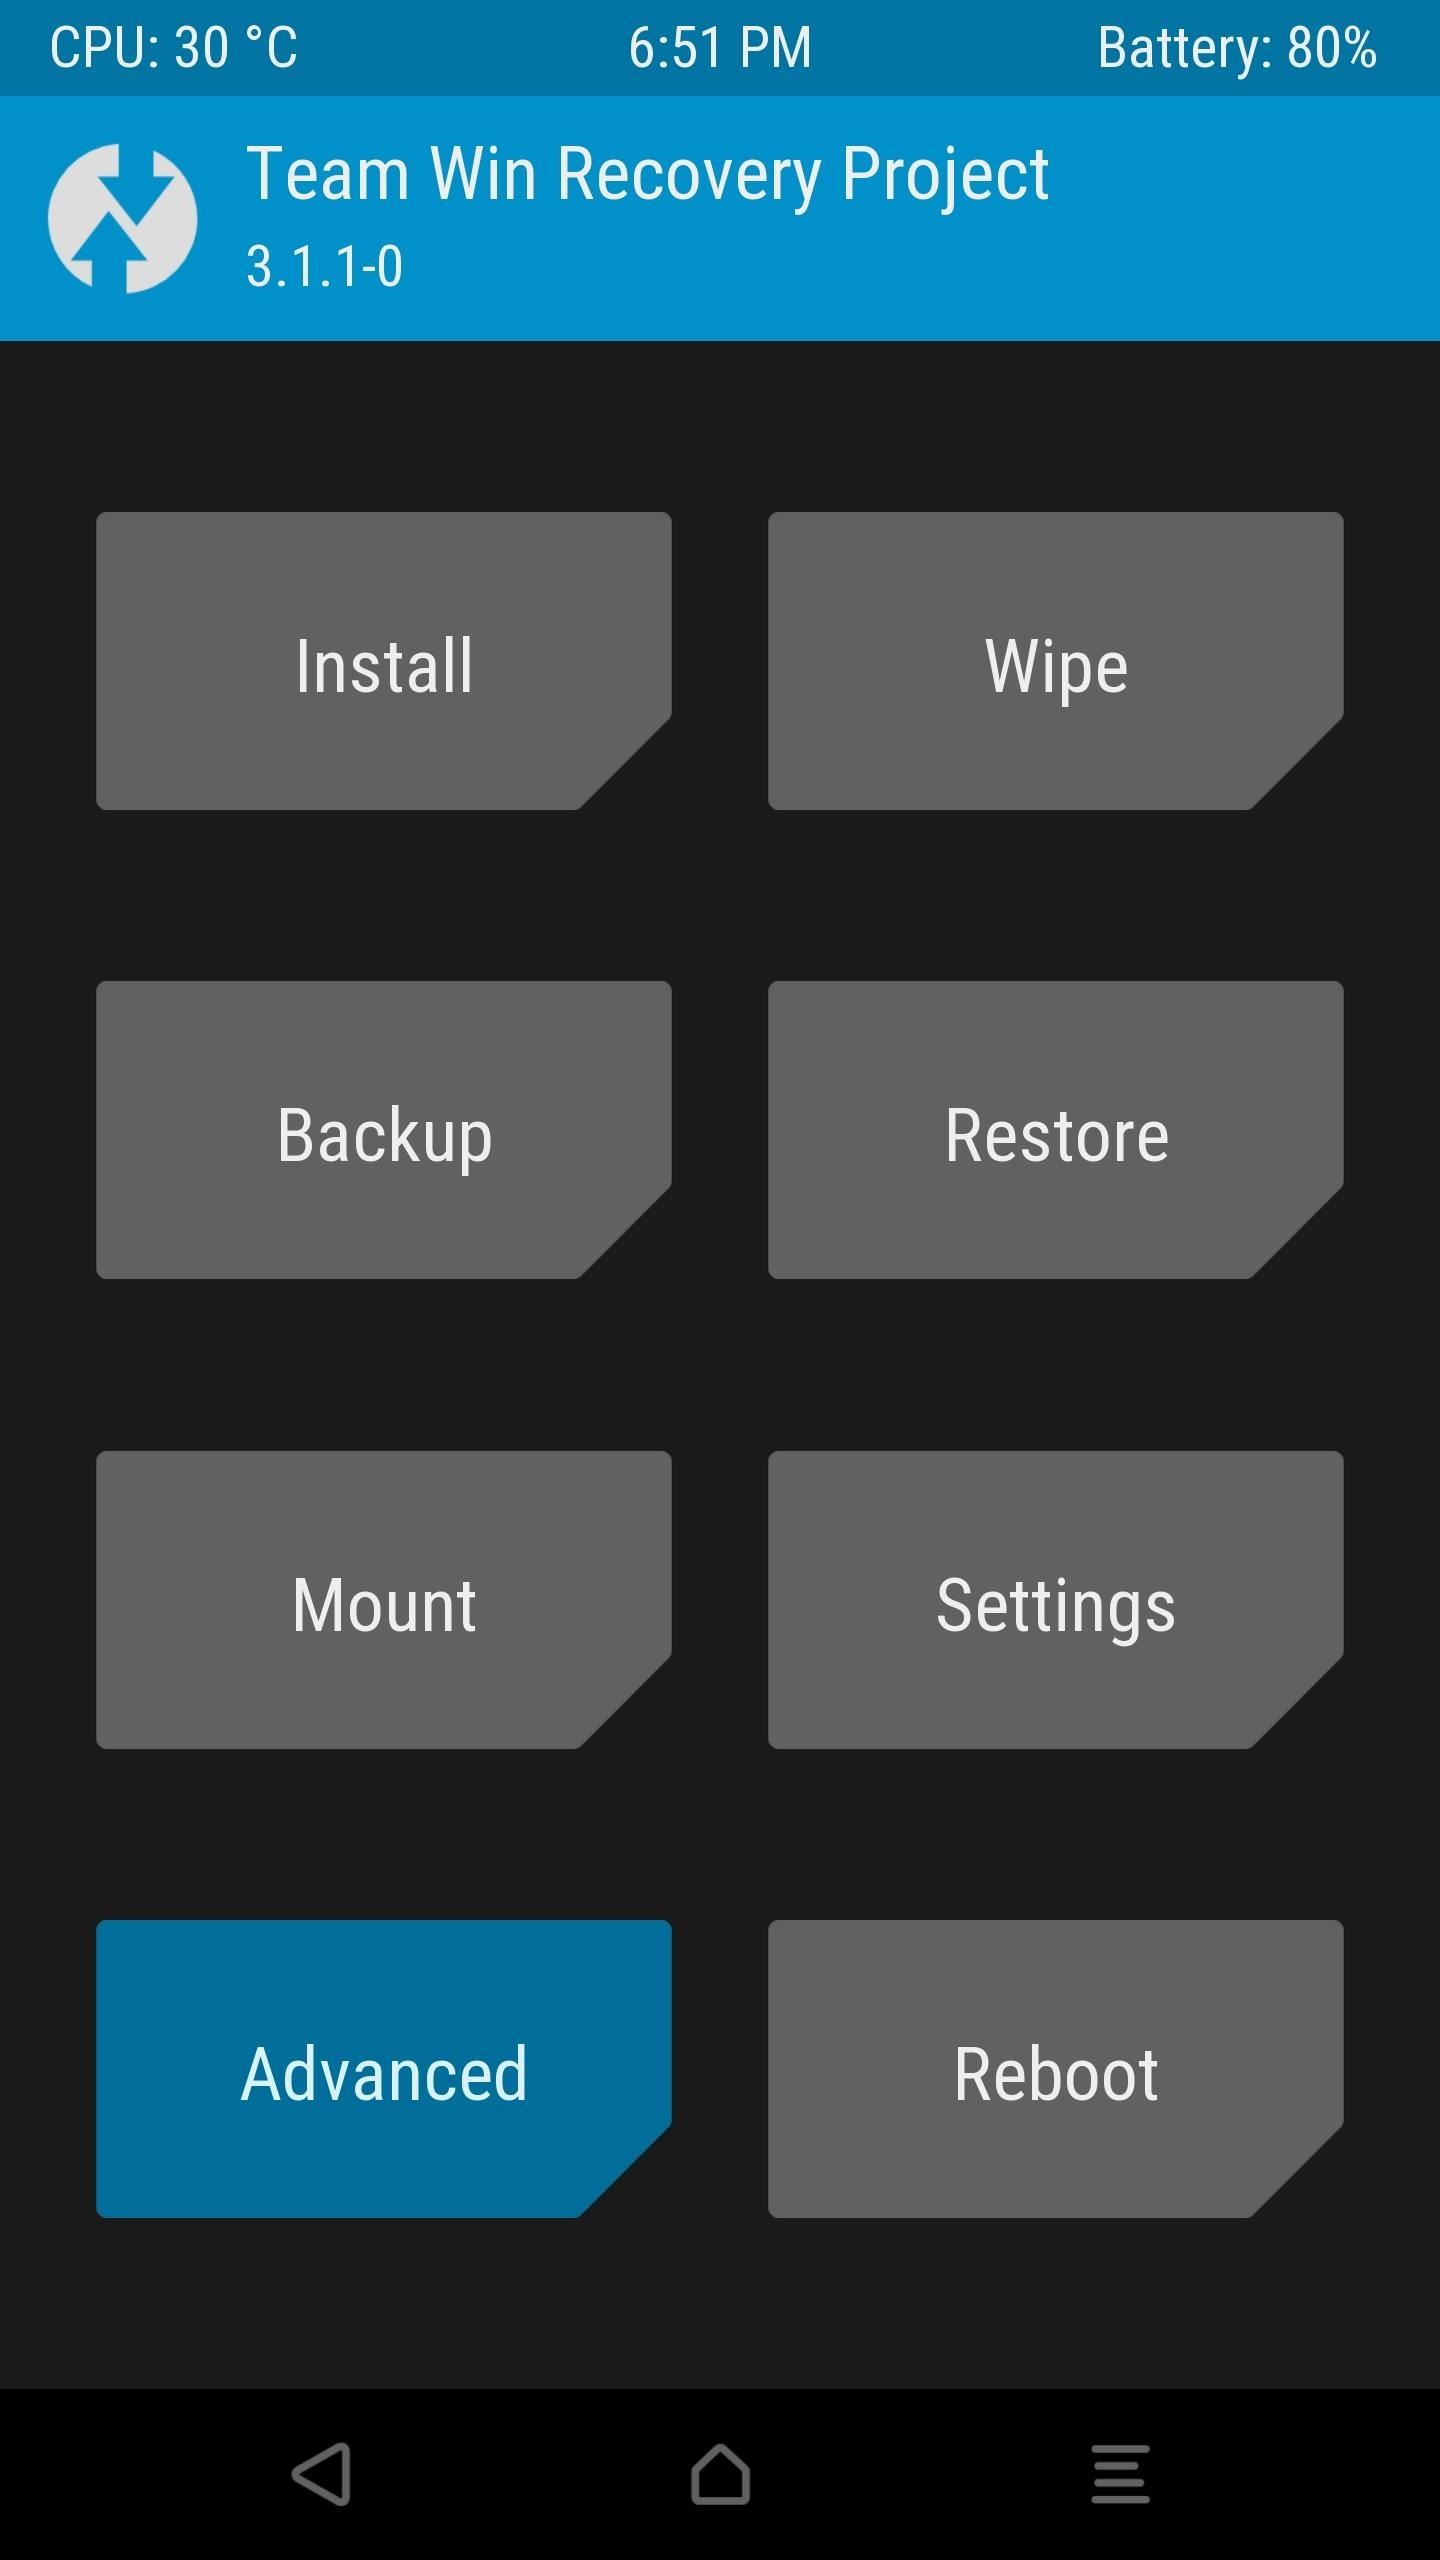
Method 2: Sideload the Xposed Disabler ZIPIf the above method didn't work, you'll have to sideload the Xposed Disabler ZIP using TWRP recovery. If you don't already have TWRP recovery installed, a last resort option is to factory reset your phone.But to start with this second method, make sure you have ADB and Fastboot installed on your computer. From there, you'll need to boot your phone into recovery mode, which is a process that will vary depending on your device. So if you don't know the button combo for entering recovery mode on your model, we suggest googling "boot into recovery mode <device name>" and following one of the instructional videos.Once you've put your phone into recovery mode, tap the "Advanced" button on TWRP's main menu, then select "ADB Sideload." From there, swipe the slider at the bottom of the screen to initiate the sideload process. After that, connect your phone to your computer with a USB cable. Next, open a command window on your computer and change directories to the platform-tools folder inside of your ADB and Fastboot installation directory (using "cd <folder location>"). If you don't know where this folder is, search your computer's hard drive for "platform-tools."Note: For Windows users who followed these steps to install ADB, this command will be as follows:cd C:\Program Files (x86)\Android\android-sdk\platform-tools Next, type "adb sideload" into the command prompt (without the quotes), then add a space after the word "sideload," but don't hit enter just yet.Note: Linux, Mac, and Windows PowerShell users will likely have to add a period and a slash (./) to the beginning of the above command (i.e., "./adb sideload "). From there, download the Xposed Disabler ZIP to your computer. Once the file has finished downloading, drag it into the command prompt window and let go. This will auto-populate the file's location and finish the "adb sideload" command you started entering earlier. So go ahead and press the enter button on your keyboard to sideload the ZIP. When that's finished, tap "Reboot System" on your phone, and when you get back up, Xposed will be disabled. So, again, just uninstall the broken module from the Modules section in your Xposed Installer app, then delete the disabler file as depicted at the end of Method 1 above.Which of these two methods ultimately got you back up and running? What module did you install that soft-bricked your device in the first place? Tell us all about it in the comment section below, and don't hesitate to ask any questions you might have!Don't Miss: The 5 Best Phones for Rooting & ModdingFollow Gadget Hacks on Facebook, Twitter, Google+, YouTube, and Instagram Follow WonderHowTo on Facebook, Twitter, Pinterest, and Google+
Cover image and screenshots by Dallas Thomas/Gadget Hacks
How to Jailbreak an A4 and below + A5 Device With RedSn0w. With the release of RedSn0w 0.9.12b1, you can now jailbreak A5 devices on iOS 5.1.1 (iPad 2, iPhone 4S, iPad 3) using the Rocky Racoon exploit.
Unlock ANY iPhone Carrier (X, 8 Plus, 7, 6S, SE) iOS 11.4.1
If you don't have a link to tap on and don't want to use your camera to scan a Snapcode, you can also just save the Snapcode image to your default photos app to scan inside the app. Afterward, in Snapchat, just tap on your profile icon, tap the settings cog, then choose "Snapcodes" from the list.
9 Snapchat Tips and Tricks You May Not Know About
The feature pulls in images you've taken at a particular location to give you an overview of your travels. Here's how it works. How to view your location history in Google Maps | Android Central
Yes, Google Maps is tracking you. Here's how to stop it
How to Unlock HTC One M8 Bootloader. Visit the HTCDev website and login to your account. Open the bootloader unlock page. Select HTC One (M8) in the Supported Devices drop-down menu and click on Begin Unlock Bootloader. Agree to all the terms and conditions, and proceed further.
How to Unlock the Bootloader & Root Your HTC One Running
View every Instagram 'like' you've ever given a photo, video. You can now view and browse all of the posts you've liked on Instagram in chronological order. On iOS the layout is customizable
Instagram: Here's How to View the Posts You've Liked
How To: Build and use a handheld automated warspying device How To: Create a portable Nintendo 64 How To: Build a handheld version of the TSA's microwave-based body scanner How To: Completely beat Super Mario 64 for the Nintendo 64
How to Make a Handheld Portable Nintendo 64 N64 Gaming
Several paid applications from Apple's App store allow you to use your iPad as a flash drive or USB storage device without jailbreaking. Examples of these flash drive applications include Flash
How to Connect a USB flash drive to a jailbroken Apple iPad
Texting can be difficult sometimes. When you're browsing the web or playing a game on your iPhone and need to respond to text message real quick, you have to exit your current app to do so. Not exactly efficient, especially if a quick "K" is all you need to say. However, if you jailbreak your iPhone
How to quickly send and reply with iMessage for iPhone or
By doing so, you can save a lot of time on several occasions. For example, during Christmastime, you may create a greeting message and send it to anyone. It can also be helpful if you have to give the same information to several people. To send the same message to multiple contacts on WhatsApp use the Broadcast function. Why not just use a group?
How to Send WhatsApp Message to All Contacts - TechWelkin
Learn How to Share Google Drive Files or Documents. In my last article, I discussed how you can share big files online using your SkyDrive storage space. Now that Google has also joined the cloud
Tips on Sharing Files and Folders with Google Drive | www
Check out our article on the best practices for managing your network firewall for an in-depth look at how you might want to configure your firewall rules. When you have completed setting up your firewall the way you want it, you should test your firewall to ensure that it is doing what you're expecting it to.
How to Track Firewall Activity with the Windows Firewall Log
0 comments:
Post a Comment